Table Of Content
You can glue the pieces back together using the icing. Make sure the icing sets completely before you finish constructing the house. We don’t recommend using a silicone mat for this project. When you are cutting the gingerbread house templates, you may accidentally cut your mat and ruin it.
Buttery Breakfast Casserole
You’ll also need an electric mixer for the royal icing. This is where it really helps to have more than two hands working on a house, and why making a gingerbread house is so much more fun with company than alone. Pipe royal icing to make decorative designs around the walls of the house and roof. Use royal icing to "glue" pieces of candy to the house. I gathered a few links for you to use as decorating inspiration. There are so many beautiful (and SIMPLE) decorated gingerbread houses out there.
Recipe of the Year
If you’re decorating with kids, it helps to assemble the houses the day before, so they are fully stable and ready to pile on the candy. You are making a cookie dough, so you will need the basic pantry items. You will also need molasses to make these gingerbread houses, which you should be able to find in the baking aisle of your grocery store. Don’t forget to pick up the meringue powder as well, you will need it to get your icing nice and firm!
Gallery of Gingerbread Houses by our Readers
New Canaan Now & Then: 'The Gingerbread House' - New Canaanite
New Canaan Now & Then: 'The Gingerbread House'.
Posted: Thu, 25 Apr 2024 21:45:50 GMT [source]
For the icing, a stand or hand mixer is necessary to get the right texture to hold the house together. The icing is ready when it is smooth, glossy, and holds a stiff peak. Transfer the icing into piping bags and tightly cover any excess for later use — it dries out easily.
Baking and prepping
However, this dough may need a little extra flour to get the same consistency, if the vegan butter is softer than regular butter. I love to use candy to decorate the house and make it colorful. Also pipe royal icing along the middle to join the two parts of the roof. Step 15 – Using a paddle beater, or a hand mixer, add the confectioner’s sugar to the meringue base and mix.

Explore Pan Dulce Recipes
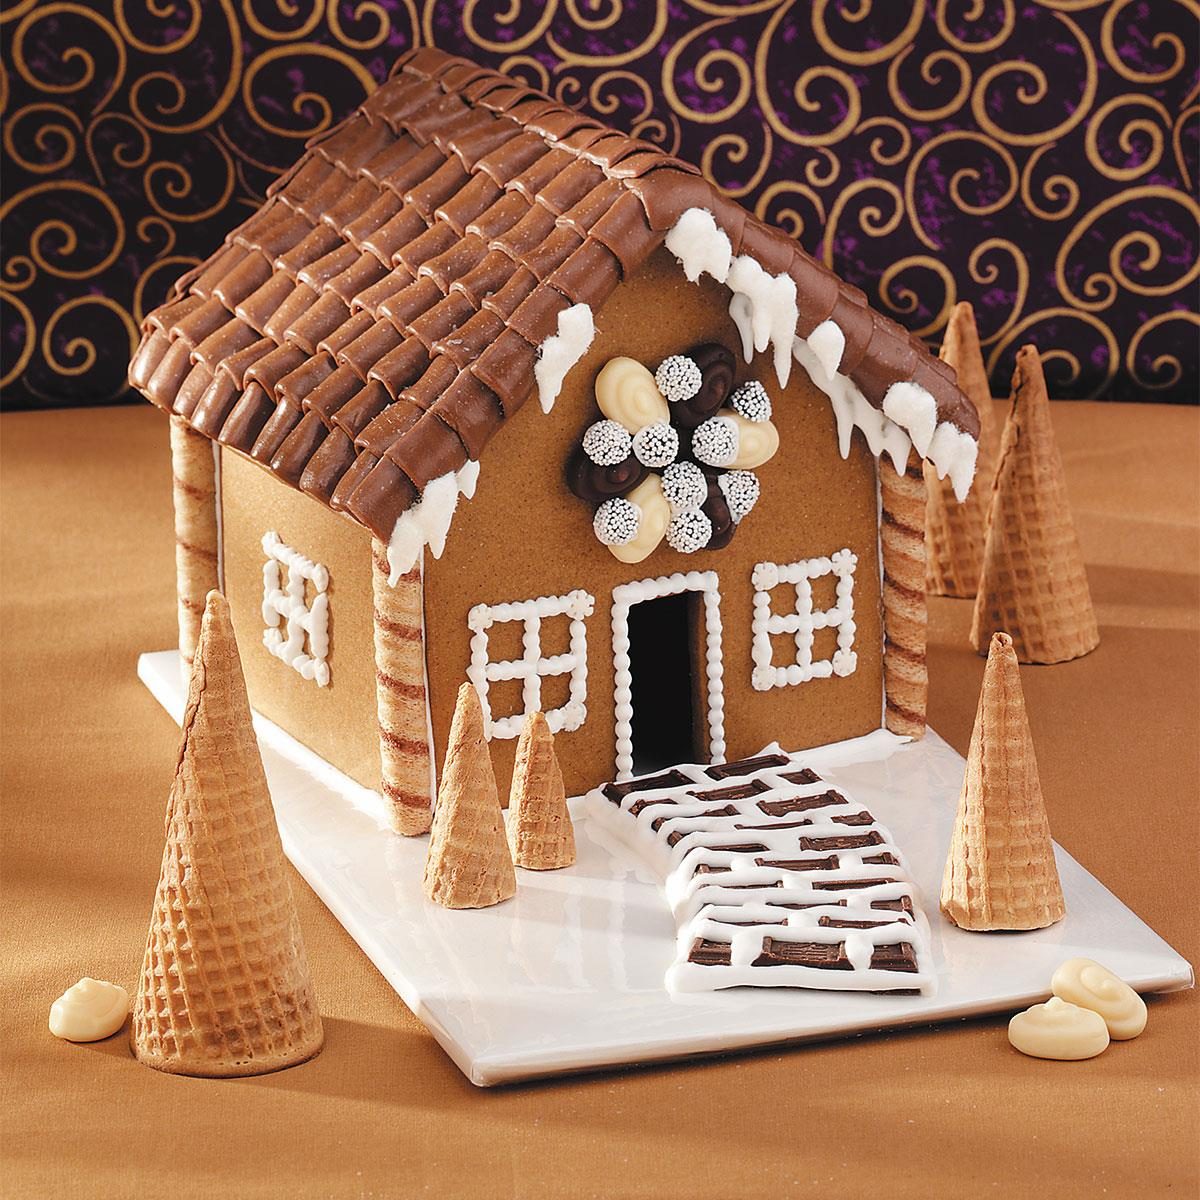
Do not use warm air as this will melt the royal icing. Once all the walls are “cemented” on to the base, and to each other, pipe more royal icing on the inside to reinforce the joints (Image 40). Pipe more royal icing on the base to stick the front (or back) of the house, perpendicular to the wall (Image 38). Snip off the end of the piping bag (about ½ cm opening) with royal icing. Pipe a line of royal icing on the base to stick the wall (Image 37). Place the royal icing in a large piping bag or a ziploc bag (Image 36).
Gingerbread House Recipe (with Template)

Stretched over a few winter evenings or a weekend, it’s a festive effort — especially with a group. Dahn is a retired nurse, recipe creator, home cook, baker, and self-proclaimed foodie. She loves creating in the kitchen and cooking for family and friends. She lives in Washington State with her husband and dog. When she isn't cooking or baking, you can usually find her spending time with her grandchildren or exploring the beautiful Pacific Northwest. Send us a picture of your gingerbread house and we will add it to our gallery below.
See Your Gingerbread Houses!
The dough is not hard to make, which makes this the perfect recipe to make with kids and friends. It also makes the house smell like the holidays and fills the kitchen with Christmas cheer! I loved making this recipe, and I know you’ll enjoy it too. To store your gingerbread house, cover it in a large plastic bag to protect it from dust and store it in a dry, protected place. Pipe royal icing along the top of the walls and top edges of the front and back of the house panels. Allow the royal icing to completely set and harden before adding the roof (Image 41).
Gingerbread House (recipe and pattern)
Add the eggs, one at a time, mixing in between. This will ensure that the eggs mix in properly. Next, add the sugar, and cream the butter and sugar together until the mixture is creamy (Images 4 and 5). Make sure to scrape the sides of the bowl so that the butter and sugar mix well.
You will need two types of royal icing when making the gingerbread house. Step 10 – Place the gingerbread house templates on the dough, and cut the shapes using a craft knife or a small sharp kitchen knife (Images 24 and 25). While the dough is chilling, prepare the gingerbread house template.
Any remaining space can be used to cut out the chimney parts, and other gingerbread shapes you like. Use dough thickness guide to make it easier to roll out the dough to an even thickness. Place the template on the cardboard and use a bench scraper to make sure that the template is stuck to the board with no bubbles or wrinkles (Image 18). Form each dough portion into a smooth disc, while dusting it with flour to prevent it from sticking (Image 14). I like to weigh the dough and divide it equally (Image 13). Scrape down the bowl as much as possible to prevent the flour from settling at the bottom of the bowl.
Seal the opening of the piping bag or ziploc bag, making sure to remove as much air as possible. Exposure to air will cause the royal icing to harden. Bake the gingerbread (maximum of 2 trays at a time), for about 15 – 20 minutes (cut out pieces) or 20 – 25 minutes (without removing scrap dough). I use a guide that is about 5 – 6 mm thick for most of the dough.
You can also wrap the dough in plastic wrap. I like to keep it as a square so that it’ll be easier to roll out later (Image 15). Do not knead the dough – the way you would with bread dough. Instead, simply fold the dough over itself a few times. The dough might be fairly sticky, so use the remaining flour to flour the dough and your work surface (Image 12).